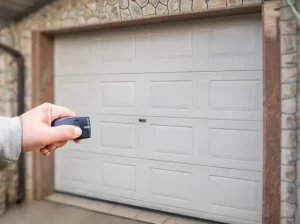
Picture this: it is a cold, foggy Tuesday morning in the Sunset District. The coffee is brewing, the car is running and the garage door remote does absolutely nothing. No click. No movement. Just silence. For thousands of San Francisco homeowners who rely on LiftMaster garage door openers every single day, a remote that stops working is more than a minor inconvenience. It is a real disruption.
LiftMaster is one of the most widely installed garage door opener brands across the Bay Area, from the Richmond District to Bernal Heights and everywhere in between. Their remotes use advanced rolling code technology, which means the programming process is a bit more involved than older systems. But with the right steps, most homeowners can get their remote working again without calling a technician.
This covers everything a San Francisco homeowner needs to know: how to set a LiftMaster remote from scratch, how to troubleshoot a remote that refuses to sync, how to erase old codes after moving into a new home and when it makes more sense to call a local garage door professional than to keep troubleshooting on your own.
Quick Answer
To set a LiftMaster remote: press and release the Learn button on the motor unit, then within 30 seconds press and hold the button on your remote until the opener lights flash or you hear two clicks. The remote is now programmed. If the remote does not respond, check battery strength, signal interference and model compatibility before attempting to reprogram.
If your opener still isn’t performing as expected, find out what could be causing the issue in When to Adjust Your LiftMaster Opener and Why It Matters.
What You Need Before You Start
Before touching a single button, gather everything needed to make the process go smoothly. Skipping this step is one of the most common reasons people end up frustrated halfway through programming.
- Your LiftMaster remote control (check the model number printed on the back)
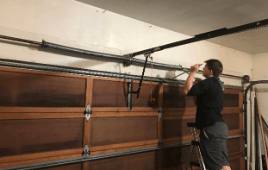
- Access to the garage door opener motor unit mounted on the ceiling
- Fresh batteries installed in the remote (old batteries cause more failed programming attempts than anything else)
- A stepladder if the motor unit is mounted high on the ceiling
- The model number of your LiftMaster opener (found on the label on the motor unit)
Pro Tip for San Francisco Homes: San Francisco’s coastal fog, especially in neighborhoods like the Outer Sunset and the Richmond, creates above-average humidity that can drain remote batteries faster than typical. Swap batteries every six months as part of regular home maintenance and keep a spare set in a kitchen drawer.
While you’re keeping up with maintenance, strengthen your home’s security even further with our guide on Reset LiftMaster Keypad Code and Improve Garage Security.
Understanding Your LiftMaster Opener: Which Model Do You Have?
Not all LiftMaster openers are programmed the same way. Knowing which system is installed in your garage before starting will save a lot of time and confusion. Here is a breakdown of the most common models found in San Francisco homes.
Security+ (Older Systems)
Found in homes built or renovated before the mid-2000s, these use a fixed-frequency system. Programming is simple but offers less security than newer models. The Learn button is typically orange or red.
Security+ 2.0 (Most Common in San Francisco)
This is the system found in the majority of SF homes built or remodeled in the past 15 years. It uses rolling code technology, which generates a new code every single time the remote is used. This makes it significantly harder for thieves to duplicate the signal, which is a real concern in a dense urban environment like San Francisco. The Learn button is typically yellow.
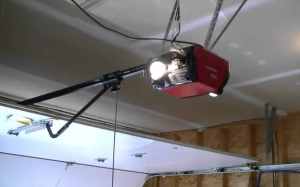
MyQ-Enabled Openers (Smart Garage Systems)
Popular in tech-forward neighborhoods like NOPA, the Castro and Pacific Heights, MyQ openers connect to home Wi-Fi and allow smartphone control through the LiftMaster app. These systems still use a physical remote, but they also offer app-based access and activity monitoring.
To find the model number, look for a white or silver label on the side or back of the motor unit. It will show a series of numbers that can be cross-referenced on the LiftMaster website to confirm the exact programming steps needed.
Once you’ve identified your model, follow our complete walkthrough in Mastering Your LiftMaster: A Step-by-Step Guide on How to Program LiftMaster Keypad for a smooth and hassle-free setup.
Step-by-Step: How to Program a LiftMaster Remote Control
These steps apply to most LiftMaster Security+ and Security+ 2.0 systems, which cover the large majority of openers in San Francisco. MyQ-specific app pairing has a slightly different process, which LiftMaster documents on their official support site.
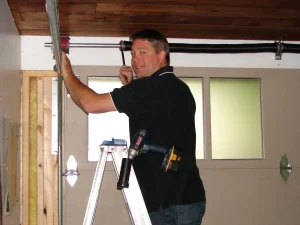
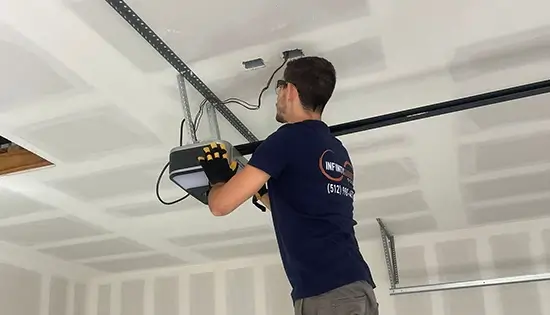
Locate the Learn button on the motor unit.
The Learn button is on the back or side of the motor unit mounted to the ceiling. It is a small, square button usually labeled with the word “Learn.” The color of the button or its indicator light will tell which generation of system it is: yellow for Security+ 2.0, orange or red for older Security+ systems and purple for some commercial models.
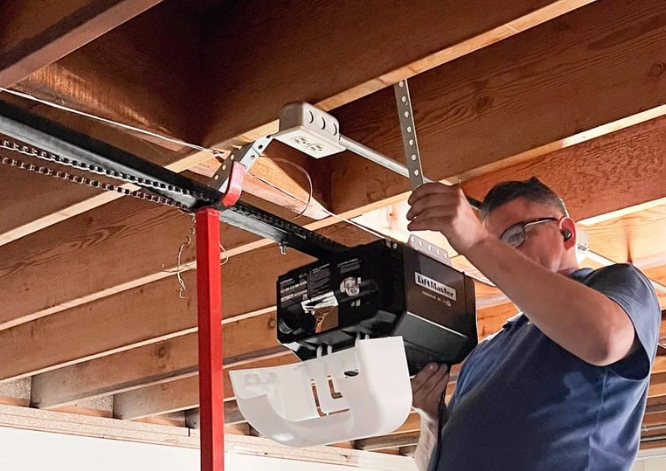
Press and release the Learn button.
Once pressed, the indicator light next to the button will turn on. This opens a 30-second programming window. The clock starts ticking immediately, so have the remote ready before pressing the Learn button.
Press and hold the button on the remote.
Within the 30-second window, press and hold the button on the LiftMaster remote that should control this door. Hold it down until the lights on the motor unit blink or two clicks are heard. That blink or click is confirmation that the signal has been received and the remote code has been saved.
Test the remote from a safe distance.
Step back from the door and press the button once. The door should begin to move. If it does not respond, check that the 30-second window was not missed and try again. If it does respond, the programming was successful.
Repeat the process for any additional remotes.
Each remote must be programmed separately. Press the Learn button again for each one, as a new 30-second window is needed for every device being added.
Safety Reminder: Never stand directly under or in the path of the garage door while testing. San Francisco homes, particularly older properties in Bernal Heights, Excelsior and Noe Valley, often have heavier solid wood or carriage-style doors. Always keep children and pets clear of the door path during any testing.
How to Program a LiftMaster Remote to a Car (HomeLink System)
Drivers searching for how to pair a LiftMaster garage door opener to a car are typically referring to HomeLink integration. Many newer vehicles come with a built-in garage door transmitter system called HomeLink, built directly into the sun visor or the rearview mirror. For San Francisco drivers who want to open the garage without reaching for a separate remote, HomeLink programming is worth knowing about.
Most domestic and import vehicles from the past 15 years include HomeLink, including popular models from Toyota, Honda, Ford, Chevrolet, BMW and Mercedes-Benz. Check the owner’s manual or look for small buttons on the visor or mirror trim to confirm whether the vehicle has it.
Because LiftMaster Security+ 2.0 uses rolling codes, the standard HomeLink method requires an extra step:
- First, train the HomeLink button in the car using the existing handheld LiftMaster remote.
- Then, complete a second step using the Learn button on the motor unit to sync the rolling code to the car system.
- Finally, test the HomeLink button from the driveway before closing the garage.
The most common mistake during HomeLink setup is skipping the second step with the Learn button on the opener. Without it, the car will attempt to send a fixed code that the rolling code system will not accept.
LiftMaster Remote Not Working After Programming? Here Is What to Check

Even after following every step correctly, sometimes a remote just will not sync. Before calling a technician, run through these common causes. Most of them can be checked in five minutes or less.
Dead or Weak Batteries
This is the number one culprit. A battery that still has some charge may power the remote’s LED but not produce enough signal strength to reach the opener’s receiver. Replace the battery with a brand new one, even if the old one seems fine and try programming again.
Signal Interference
San Francisco’s dense urban environment creates a uniquely challenging radio frequency landscape. Nearby Wi-Fi networks, smart home hubs, LED light bulbs installed in the opener housing and even baby monitors can interfere with the 315 MHz or 390 MHz signal that LiftMaster remotes use. Try turning off nearby smart devices temporarily and test the remote again.
Frequency or Compatibility Mismatch
An older LiftMaster remote from a previous home or a universal remote that is not rated for Security+ 2.0 will not work with a newer opener, regardless of how many times the programming steps are repeated. Always confirm that the remote’s model number is compatible with the opener being used.
Opener Memory Is Full
LiftMaster openers can store a limited number of remote codes. In homes where multiple remotes, keypads and HomeLink devices have been programmed over the years, the memory can reach its limit. The solution is to clear all stored codes using the Learn button erase method (covered in the next section) and then reprogram only the devices currently in use.
Damaged or Disconnected Antenna Wire
The antenna wire on the motor unit is a thin wire that hangs down from the unit. If it has been accidentally cut, coiled up, or pushed against a metal surface, the opener’s ability to receive remote signals drops significantly. Check that the wire is hanging freely and is not visibly damaged. If it is, a professional garage door technician will need to replace it. Antenna repairs in San Francisco typically fall on the lower end of service call pricing.
Motor Unit Needs a Full Reset
In some cases, particularly after a power outage, the opener’s internal logic may need to be reset before it will accept new remote programming. This typically involves unplugging the unit for 30 seconds and plugging it back in. If the problem persists after a power reset, the logic board may need professional attention.
How to Erase All Remotes From a LiftMaster Opener
Anyone who has recently moved into a new home in San Francisco should do this immediately. Previous owners, tenants, contractors, or property managers may have programmed their remotes to the opener and never cleared them. That means unknown people may still have access to the garage.
Clearing all stored codes is a simple process. Hold the Learn button on the motor unit for approximately six seconds until the indicator light goes out. That signals that all previously stored remote codes, keypads and HomeLink devices have been wiped from the opener’s memory.
Here is what happens after a memory wipe:
- All remote controls are de-authorized and will not operate the door
- Keypad entry codes are cleared
- HomeLink settings in any paired vehicles are also de-authorized
- The opener itself is not affected, only the remote access codes stored in its memory
For homeowners using the LiftMaster 877MAX, a LiftMaster 877MAX reset follows the same general Learn button erase process but also requires clearing the PIN directly on the keypad unit.
If a keypad is part of the setup, the LiftMaster universal keypad manual covers PIN programming in detail. For those programming a LiftMaster wireless keypad from scratch or working with an old LiftMaster keypad, the process mirrors remote programming but uses the Learn button paired with a PIN entry instead of a handheld transmitter.
Knowing how to change code on liftmaster keypad is especially important after moving into a new home. To reset a LiftMaster garage door opener keypad, hold the Learn button and re-enter a new PIN. Some models also support a LiftMaster temporary code — a short-term access LiftMaster code 4–6 digits useful for contractors or guests without granting permanent entry.
8 Tips to Keep a LiftMaster Remote Working Longer
Most LiftMaster remote failures are preventable. These practical tips come from years of working with garage door systems across San Francisco and the broader Bay Area, where climate conditions and urban density create specific challenges for garage hardware.
1. Swap batteries every six months.
Set a calendar reminder. The fog and moisture along the coast accelerate battery drain. Do not wait for the remote to stop working before replacing them.
2. Do not leave the remote in a hot car.
On warm days, parked cars in SF can reach extreme temperatures, particularly in sun-exposed areas of SoMa or the Mission. Heat warps the circuit board inside the remote over time, shortening its lifespan.
3. Keep the remote away from liquids.
A single spill inside a bag or glove compartment can corrode the remote’s internal contacts and cause intermittent failures that are difficult to diagnose.
4. Clean sticky buttons with a dry cloth.
Grime buildup around the button can prevent it from making proper contact. A dry microfiber cloth works well. Avoid cleaning sprays as they can seep into the circuitry.
5. Check the antenna wire regularly.
Make sure the thin wire hanging from the motor unit is not coiled, tangled, or pressed against metal storage racks or shelving. Even a small amount of signal blockage can cause unreliable performance.
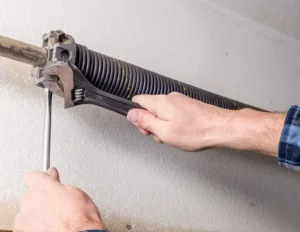
6. Have the garage door balanced once a year.
An unbalanced or heavy door puts extra strain on the opener motor. When the motor is overworked, it can cause the opener’s internal systems to behave erratically, including becoming less responsive to remote signals. During this visit, it is also worth having a technician check the cables for wear and fraying, as commercial door cable replacement is a common service that gets overlooked until a more serious problem develops.
7. Schedule an annual garage door tune-up.
A professional annual inspection covers the springs, cables, rollers, tracks and opener hardware. Local San Francisco garage door companies typically offer this service at a reasonable flat rate and can catch small problems before they become expensive ones. If the door moves too fast, too slow, or stops short of closing fully, adjusting a LiftMaster garage door opener is often the fix. Knowing how to adjust garage door opener travel limits and force settings can resolve these issues without a service call.
8. Consider upgrading to a MyQ-enabled opener.
For San Francisco homeowners who frequently forget remotes or want to grant access to housekeepers, dog walkers, or delivery services without handing over a physical remote, a MyQ-enabled system offers smartphone-based control and full activity logs.
When to Call a Professional Garage Door Technician in San Francisco
Some remote issues are quick fixes that any homeowner can handle. Others are signs of a deeper problem with the opener or the door itself. Knowing the difference saves time, avoids safety risks and in most cases, saves money.
Call a professional when:
- The remote has been reprogrammed multiple times and still will not work consistently
- The opener motor makes unusual grinding or humming sounds when activated
- The door moves but reverses immediately, or stops midway
- The wall button works but the remote does not, even after battery replacement (this points to a receiver issue, not a remote issue)
- The opener is more than 10 to 15 years old and is showing multiple issues
- The garage is non-standard, for example in a split-level home, a converted space, or a narrow Victorian garage common in the Haight or Noe Valley
In San Francisco, service call rates for garage door repair reflect the city’s labor market and are generally higher than the national average. A basic diagnostic and remote-related service typically falls in the low-to-mid range for a single visit. A full opener replacement, including installation labor and hardware, runs significantly higher depending on the system selected. For properties upgrading their setup entirely, this is also a good time to consider a commercial insulated garage door, which offers better temperature control and energy savings, especially in San Francisco’s fluctuating coastal climate.
When hiring a garage door company in San Francisco, look for one that is licensed, carries liability insurance and has verifiable local reviews. Ask for a written estimate before any work begins and confirm that the quote includes both parts and labor.
Your LiftMaster Remote Does Not Have to Be a Problem
Setting a LiftMaster remote control does not have to be a frustrating experience. In most cases, it takes less than five minutes from start to finish. The key is knowing which opener model is installed, having fresh batteries ready and following the Learn button sequence without rushing.
For San Francisco homeowners dealing with the city’s unique mix of older housing stock, dense urban interference and coastal climate, a little extra attention to remote maintenance goes a long way. Swapping batteries twice a year, keeping the antenna wire clear and scheduling an annual tune-up are habits that prevent most problems before they start.
When the problem goes beyond the remote, whether it is a failing receiver, an aging opener, or a door that is out of balance, a qualified local garage door technician is the right call. Look for licensed, insured professionals with strong local reviews, ask for a written estimate upfront and avoid any company that will not provide one. A full inspection often uncovers other issues worth addressing at the same time, such as worn commercial door weatherstripping, which can affect energy efficiency and door performance just as much as a faulty opener.
Your Local Garage Door Experts in San Francisco
For San Francisco homeowners who want the job done right the first time, Automatic Garage Door Corporation has been serving the Bay Area with honest, reliable and expert garage door service for years. From LiftMaster remote programming to full opener installations and everything in between, our team brings hands-on experience to every job, no matter the size. With a deep understanding of the unique garage door challenges that come with San Francisco homes, we are the trusted local name homeowners turn to when it matters most. Ready to get your garage door working like it should? Contact us today or give us a call to get a free estimate from San Francisco’s most trusted garage door professionals.