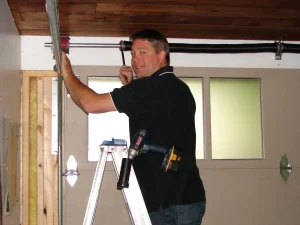
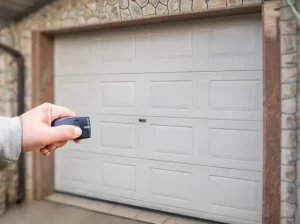
Standing in the driveway, pressing the LiftMaster garage door remote over and over and nothing happens. Sound familiar? This is one of the most common service calls received from homeowners across San Francisco and the greater Bay Area. The good news is that most of the time, the fix is simpler than expected. This guide covers the most likely reasons a LiftMaster remote stops working, what to look for and what steps can help get the garage door moving again without unnecessary stress.
Dead or Weak Batteries
This is the starting point for a reason. Battery failure accounts for a large share of LiftMaster remote problems reported by homeowners. Most LiftMaster remotes run on a CR2032 coin cell battery or a standard 9-volt and neither lasts forever. Depending on how often the garage is used, batteries typically last anywhere from one to two years.
Here in San Francisco, the coastal climate plays a role that many homeowners do not think about. The damp air and shifting temperatures near the Bay can accelerate battery drain compared to drier inland regions. If the remote has not had a fresh battery in over a year, that is the first thing to address.
What to Check
- Press the remote button and watch the LED indicator light. A dim flash or no light at all points directly to a dead battery.
- Try pressing the button from a much closer distance to the opener unit. A weak battery shortens signal range significantly.
- Open the battery compartment and check for corrosion. Greenish or whitish residue around the metal contacts means the battery has leaked and the contacts may need cleaning before a new battery will work.
Pro Tip: Keep a spare battery in the glove compartment or a drawer near the garage. Replacement batteries are available at any hardware store or pharmacy in neighborhoods like the Mission, SoMa, or the Richmond District.
For a full walkthrough on getting the remote up and running again, check out this helpful guide: How to Set a LiftMaster Remote Control.
Remote Is Out of Range or the Signal Is Being Blocked

LiftMaster remotes are built to operate within a specific range, typically somewhere between 50 and 100 feet. Pressing the remote from too far away, from an unusual angle, or from inside a vehicle with heavy window tinting can all reduce or block the signal before it reaches the opener.
This is a common issue in San Francisco’s older Victorian and Edwardian homes, where thick concrete walls, metal-clad garage doors and heavy insulation can all work against the remote’s radio signal. The city’s density also means more physical obstructions between the remote and the opener.
What to Check
- Walk up close to the garage door and test the remote from about 10 feet away. If it works at close range but not from further back, signal range is the issue.
- Look for large metal objects inside or near the garage that could be blocking the signal, such as metal shelving units, tool cabinets, or parked vehicles.
- Point the remote directly toward the motor unit on the ceiling rather than at the door itself. The receiver antenna is on the opener, not the door.
Watch Out: Newer LED bulbs installed in the garage can emit radio frequency interference that disrupts the remote signal. If the garage lights were recently upgraded to LED, that change could be contributing to the problem.
If the remote still needs to be paired to the opener after resolving the signal issue, this guide covers everything needed: How Do You Sync a LiftMaster Remote Control.
The Remote Needs to Be Reprogrammed
Sometimes a LiftMaster remote loses its pairing with the opener entirely. This can happen after a power outage, after someone accidentally clears the opener’s memory, or when a new opener is installed without re-syncing all the remotes. Think of it the same way a Bluetooth headset sometimes loses its connection to a phone and needs to be paired again from scratch.
San Francisco homeowners deal with power outages more often than many realize, particularly during winter storm season when Pacific storms roll in from the coast. Each outage is an opportunity for an opener’s memory to reset.
What to Check
- Press the wall-mounted button inside the garage. If the door opens from the wall button but not from the remote, the opener is working fine and the remote simply needs to be reprogrammed.
- Test any other remotes on the same opener. If other remotes still work, the problem is isolated to the one remote.
- Locate the Learn button on the opener unit. Depending on the LiftMaster model, this button is typically color-coded in purple, yellow, red/orange, or green and is found on the back or side of the motor head.
Pro Tip: Reprogramming a LiftMaster remote is a quick two-step process using the Learn button. For anyone not comfortable doing this independently, a local garage door technician can handle it as part of a standard service visit.
Average cost to fix: Minimal if done independently. Typically included in the cost of a standard service visit if a technician handles it.
Not sure where to start with reprogramming? This related read breaks it down step by step: Can You Reset a LiftMaster Remote Control.
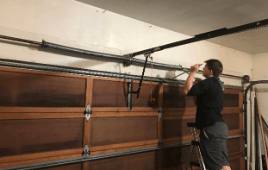
The Antenna on the Opener Is Damaged or Misaligned
Every LiftMaster opener has a thin wire antenna hanging down from the motor unit. This is the component that picks up the radio signal sent from the remote. If that wire is coiled, tucked up inside the housing, physically damaged, or pointing in the wrong direction, the opener cannot receive the signal properly no matter how close the remote is.
What to Check
- Look at the motor unit mounted to the garage ceiling. There should be a thin wire hanging straight down from the unit. If it is bundled up, looped around the unit, or pushed up inside, carefully let it hang free.
- Inspect the wire for any visible cuts, kinks, or fraying. Even small damage to the antenna wire can significantly reduce reception.
- If the antenna appears intact and properly positioned but the remote still does not work, the receiver board inside the unit may need professional testing.
Average cost to fix: Antenna repositioning costs nothing if handled personally. Receiver board replacement falls in the low-to-mid range of a standard professional service call.
")
Radio Frequency Interference from Nearby Devices
This one catches many homeowners off guard. Radio frequency interference has become a growing issue, especially in dense urban environments like San Francisco. WiFi routers, smart home hubs, wireless security cameras, baby monitors and even neighbors’ electronics can all compete on or near the frequency bands that LiftMaster openers use.
Older LiftMaster models operate at 315 MHz or 390 MHz. Newer models use 433 MHz or the Security+ 2.0 system. Any device broadcasting on or near those frequencies has the potential to cause intermittent or complete signal failure.
What to Check
- Think back to any new electronics added to the home recently, particularly near the garage. Smart TVs, wireless cameras, new routers and gaming consoles are all worth considering.
- Try unplugging nearby devices one at a time to see if the remote begins working again.
- Pay attention to whether the problem is worse at certain times of day. If the remote works fine in the morning but fails in the evening, interference from neighbors’ devices could be the cause.
San Francisco Note: In high-density neighborhoods like the Richmond, the Sunset, the Castro and Noe Valley, radio frequency interference from units in adjacent buildings is a genuinely common issue. A garage door professional with Bay Area experience can diagnose this efficiently.
The Lock Button Was Accidentally Activated
This is one of the most overlooked explanations for a non-responsive LiftMaster remote. The wall control panel has a Lock button that, when activated, disables all remote controls completely. Only the wall-mounted panel will operate the door when this mode is on. The feature exists as a security measure, but it is easy to press by accident, especially in households with children.
What to Check
- Locate the wall control panel inside the garage and look for a button marked with a lock icon or the word Lock.
- If the lock indicator light is lit up, the system is in lock mode. Press and hold the Lock button for a few seconds to deactivate it.
- Test the remote after deactivating lock mode to confirm the issue is resolved.
Pro Tip: Using the Lock feature intentionally when leaving for a weekend trip to Wine Country or a vacation is actually smart security practice. Just remember to turn it off upon returning home.
The Safety Sensors Are Misaligned or Blocked
Every LiftMaster garage door opener manufactured after 1993 includes two photo-eye safety sensors positioned near the bottom of the door tracks. These sensors project an invisible beam across the garage opening. If anything interrupts that beam, or if the sensors shift out of alignment, the opener will refuse to operate, even when using the wall button.
San Francisco’s combination of coastal fog, moisture and year-round dust makes sensor lens buildup a surprisingly common issue. A foggy or dirty sensor lens can scatter the beam just enough to trigger the safety shutoff.
What to Check
- Look at the two small sensor units near the base of each door track. Each one should display a steady LED light. The receiving sensor typically shows green and the sending sensor typically shows yellow or amber.
- A blinking light or no light at all on either sensor indicates misalignment or a blocked beam.
- Gently wipe both sensor lenses with a clean dry cloth to remove any buildup.
- Scan the area near the sensors for objects sitting in the path of the beam. Bicycles, brooms, storage boxes and garden tools are frequent offenders.
Average cost to fix: Sensor realignment is typically included in a standard service visit. If a sensor needs to be replaced due to physical damage, the cost falls in the moderate repair range.
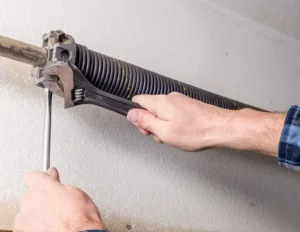
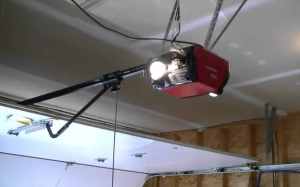
The Opener Unit Itself Has a Problem
When everything else has been checked and the remote still refuses to work, the issue may be inside the opener unit itself. The logic board (the electronic brain of the opener), the receiver module, or the drive motor could all be experiencing a fault. This is less common than the other causes on this list, but it does happen, particularly on older LiftMaster units or after a significant power event.
San Francisco is particularly vulnerable to electrical surges during Pacific storm season and during PG&E grid outages. A power surge can damage the opener’s control board even if the unit still appears to be powered and functioning on the surface.
What to Check
- Unplug the opener from the wall outlet for a full 30 seconds, then plug it back in. This performs a soft reset that clears minor electronic glitches.
- Press the wall button after the reset. If the door does not respond to the wall button either, the problem is definitely in the opener unit, not the remote.
- Check the indicator lights on the opener for blinking patterns. LiftMaster uses specific blink codes to indicate particular fault types, which a professional technician can read and interpret quickly.
- While the technician is on site, it is also worth having the cables inspected. Commercial door cable replacement is a common service need on older units and addressing it early prevents a much bigger problem down the line.
Important: An opener that is more than 15 to 20 years old and experiencing multiple issues at once may cost more to repair than it is worth. An honest assessment from a qualified garage door professional in the Bay Area can help make that determination.
Average cost to fix: Logic board repairs or receiver replacements represent a mid-range repair investment. A full opener replacement is a larger upfront cost but often the smarter long-term decision for aging units.
How to Prevent LiftMaster Remote Problems in the Future
Most LiftMaster remote problems are entirely preventable with routine care and a few simple habits. The following steps are the same ones recommended by garage door professionals working across the Bay Area every day.
- Replace the remote battery once per year. Setting a reminder tied to a recurring event, such as when clocks change for daylight saving time, makes this easy to remember.
- Wipe down the safety sensor lenses every few months, particularly during San Francisco’s foggy winter season when moisture and residue accumulate faster.
- Avoid storing items near the sensors or the opener’s antenna wire. Even a broom handle leaning against the sensor can trigger the safety shutoff.
- Install a surge protector on the outlet powering the garage door opener. This is especially important in areas with older electrical infrastructure or frequent outages, both of which describe much of San Francisco.
- Schedule an annual professional inspection of the full garage door system. A trained technician can catch small issues before they become expensive repairs. This is also a good time to ask about upgrading to a commercial insulated garage door if energy efficiency and temperature control inside the garage are a concern.
- Only use LED bulbs that are specifically rated for use with garage door openers. Standard LED bulbs can emit RF interference that disrupts remote signals.
- For homeowners buying or selling property in San Francisco, always have the garage door system inspected and tested as part of the overall home inspection process.
Still Having Trouble with a LiftMaster Remote in San Francisco?

A certified garage door technician can diagnose and resolve most LiftMaster remote and opener issues in a single visit. For San Francisco homeowners who rely on the garage as the main entry point to the home, a malfunctioning remote is more than an inconvenience. Getting it checked promptly prevents a small problem from turning into a larger and more expensive one. A full inspection also gives the technician a chance to spot other issues, such as worn commercial door weatherstripping, that could be affecting the overall performance and energy efficiency of the garage.
Reach out to a local garage door professional serving the San Francisco Bay Area. Look for a company with certified LiftMaster technicians, transparent service pricing and strong reviews from customers in neighborhoods like the Sunset, the Marina, Noe Valley and the Outer Richmond.
Trusted LiftMaster Repair Service in San Francisco
That is exactly what Automatic Garage Door Corporation brings to every job. Serving San Francisco and the greater Bay Area for years, we have built a reputation for fast response times, honest assessments and quality workmanship that homeowners across the city trust. From a simple remote reprogramming to a full opener replacement, our team handles it all with the professionalism and expertise that every garage door repair deserves. Do not let a faulty LiftMaster remote disrupt the day. Contact us today or give us a call and let us get the garage door working reliably again.