You are pulling into your driveway after a long day navigating San Francisco traffic on the 101 and you press your garage door remote. Nothing happens. You press it again. Still nothing. The frustration is real and this situation happens more often than most homeowners realize.
Whether you live in a classic Victorian in the Haight, a modern condo in Mission Bay, or a family home out in the Sunset District, a LiftMaster remote that refuses to sync is one of the most common garage door complaints in the Bay Area. The good news is that most syncing issues are completely fixable without a service call.

First, Know What Type of LiftMaster Opener You Have
Before pressing a single button, it helps to know exactly what model of LiftMaster opener is installed in the garage. Not all LiftMaster units are the same and the syncing process can vary depending on the series.
LiftMaster produces several types of garage door openers including belt drive, chain drive, direct drive and wall-mount models. Popular series include the 800 series, the 8000 series and newer MyQ-enabled smart openers that connect directly to a home WiFi network. Each series may have slightly different programming steps and remote compatibility requirements.
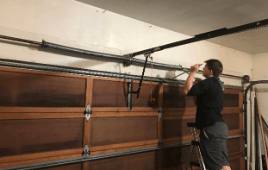
- Where to find the model number: Look at the back or side panel of the motor unit, which is the box mounted to the ceiling of the garage. The model number is usually printed on a white sticker.
- Tip for San Francisco homeowners: Many homes across neighborhoods like the Richmond District, Noe Valley and Glen Park still have LiftMaster units installed in the early 2000s. Older units may use a different frequency system than newer remotes, so confirming the model number before buying a replacement remote can save a wasted trip to the hardware store.
For a more detailed walkthrough on getting the remote up and running from scratch, the guide How to Set a LiftMaster Remote Control covers everything needed to get started on the right foot.
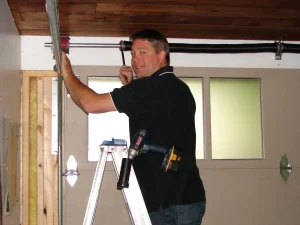
Locate the LEARN Button on the Motor Unit
The LEARN button is the key to the entire syncing process. Think of it like a handshake starter, a signal that tells the opener to stop what it is doing and listen for a new remote.
This button is typically located on the back panel of the motor unit, near the antenna wire that hangs down from the unit. Depending on the age and model of the opener, the LEARN button will be one of several colors:
- Yellow button: Older Security+ models (single-frequency, 390 MHz)
- Purple button: Security+ 2.0 (315 MHz)
- Red or orange button: Security+ 2.0 (390 MHz)
- Green button: Older multicode systems
The color of the button matters because it determines which remotes are compatible with the opener. Using the wrong remote will result in a failed sync every single time, no matter how many times the button is pressed.
- Tip: In many San Francisco garages, especially the smaller single-car setups common in older neighborhoods, the motor unit is mounted in a tight spot near the ceiling. Use a step stool and a flashlight to get a clear look before starting the process.
If the LEARN button is unresponsive or the remote still refuses to pair after following the correct steps, the guide Why Is My LiftMaster Remote Control Not Working breaks down the most common causes and what to do about each one.
Check the Remote Battery Before Anything Else

Here is something that surprises a lot of homeowners: the number one reason a LiftMaster remote fails to sync or stops working has nothing to do with the opener at all. It is a dead or weak battery.
This is one of the most common service call scenarios across the Bay Area. A homeowner spends 20 minutes trying to reprogram a remote, assuming something is seriously wrong and the only issue is a battery that is running on fumes.
What to check:
- Does the LED indicator light on the remote blink when the button is pressed? If not, the battery is likely dead.
- Does the remote only work when held extremely close to the motor unit? That is a sign the battery is weak.
- Does the remote work sometimes but not others? Intermittent performance almost always points to a low battery.
Most LiftMaster remotes use a CR2032 coin battery or a 9V battery depending on the model. Replacing the battery takes less than a minute and costs almost nothing.
- San Francisco tip: The Bay Area’s coastal fog and cooler temperatures, especially in neighborhoods close to Ocean Beach or the Outer Sunset, can drain remote batteries faster than in warmer inland climates. Keeping a spare battery in the car is a simple habit that saves a lot of headaches.
If a fresh battery did not solve the problem and starting from scratch feels like the right move, the guide Can You Reset a LiftMaster Remote Control walks through exactly how to wipe the slate clean and start the pairing process over.
Clear Old Codes Before Syncing a New Remote
LiftMaster openers use rolling code technology, which is a smart security system that generates a brand new access code every single time the remote button is pressed. This means the code changes constantly, making it extremely difficult for anyone to intercept and copy the signal.
Here is the catch: if the opener’s memory is cluttered with old or conflicting codes, it can interfere with the syncing of a new remote. Clearing all stored codes before starting fresh gives the best chance of a successful pairing.
When to clear all codes:
- Moving into a previously owned home in San Francisco (always do this on day one for security reasons)
- A remote was lost or stolen
- A replacement remote has been purchased
- Multiple failed syncing attempts have already occurred
Clearing the codes is done by holding down the LEARN button for about 6 to 10 seconds until the indicator light goes out. This erases all previously programmed remotes and keypads from the opener’s memory.
- Important note for new San Francisco homeowners: Whether the new home is in Bernal Heights, the Castro, or out in Visitacion Valley, erasing the previous owner’s remote codes is not just a troubleshooting step. It is a basic home security practice that should never be skipped.
The Actual Syncing Process Explained Simply
Now for the part everyone wants to get to. Syncing a LiftMaster remote is actually a straightforward process once the setup is understood. Think of it like pairing Bluetooth headphones to a phone. The two devices need a short window of time to find each other and establish a connection.
Here is how the general process works across most LiftMaster models:
- Step 1: Press and release the LEARN button on the motor unit. The indicator light will turn on and stay lit. This light stays on for about 30 seconds, which is the window to complete the pairing.
- Step 2: Within those 30 seconds, press and hold the button on the remote that should open the door. Hold it until the motor unit’s light blinks or until there is an audible click from the opener. That blink or click is the confirmation that the sync worked.
- Step 3: Test the remote by pressing the button from a normal distance. The door should respond.
What to check if the first attempt fails:
- Make sure the remote is within range, ideally within a few feet of the motor unit during programming
- Look for any wireless devices nearby that could cause interference, such as routers, smart speakers, or baby monitors
- Double-check that the timing was right, pressing the remote button within the 30-second window is critical
How to Sync a LiftMaster Remote to a Car’s Built-In HomeLink System
Many San Francisco drivers are already using HomeLink, the built-in garage door control system found in vehicles from brands like BMW, Ford, Chevrolet, Honda and others. HomeLink allows drivers to open the garage without a separate remote, using buttons built directly into the car’s overhead console or sun visor.
Syncing a HomeLink system to a LiftMaster opener is a slightly different process than using a handheld remote, but it follows the same general concept.
What to know before starting:
- Newer LiftMaster models with Security+ 2.0 technology require an extra step when pairing with HomeLink due to the rolling code system
- The car and the opener need to be in a “communication mode” at the same time, similar to the 30-second window process described above
General process overview:
- Clear any previously stored HomeLink codes in the vehicle
- Hold the desired HomeLink button in the car and a compatible LiftMaster remote at the same time until the HomeLink indicator flashes rapidly
- Then use the LEARN button on the motor unit to complete the rolling code handshake
Confirm which generation of HomeLink the vehicle uses. Older HomeLink systems may not be compatible with newer LiftMaster Security+ 2.0 openers without using a compatibility bridge accessory. HomeLink pairing issues are surprisingly common and often misdiagnosed as an opener problem when the issue is actually on the vehicle side. Always check the car’s owner manual for model-specific HomeLink instructions.
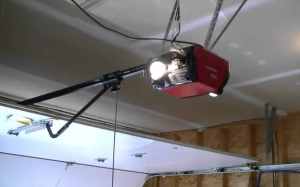
Syncing the LiftMaster MyQ App for Smart Opener Users
For homeowners with a MyQ-enabled LiftMaster opener, there is an additional layer of control available through a smartphone app. MyQ is LiftMaster’s smart home platform that lets users open and close the garage door remotely, receive real-time alerts when the door opens or closes and even integrate with smart home systems like Google Assistant and Amazon Alexa.
San Francisco’s tech-forward homeowner community has embraced MyQ in a big way, especially in neighborhoods like SoMa, Mission Bay and the Inner Sunset where smart home setups are common.
General overview of connecting MyQ:
- Download the MyQ app and create an account
- Add the garage door opener as a device within the app
- Connect the opener to the home WiFi network using the MyQ hub or the opener’s built-in WiFi (on newer models)
Many of the city’s Victorian and Edwardian homes have thick plaster or concrete walls that significantly weaken WiFi signals. If the garage is located at the back of the property or in a detached structure, the WiFi signal may not reach reliably.
- Tip: A WiFi range extender placed near the garage dramatically improves MyQ performance in these situations. This is a very common fix for San Francisco homeowners dealing with spotty smart opener connectivity.
Common Reasons a LiftMaster Remote Will Not Sync
If the syncing process has been attempted and the remote still is not cooperating, the issue may go deeper than a simple pairing problem. Here are the most common culprits:
- Wrong remote model for the opener. Not every LiftMaster remote works with every LiftMaster opener. Using a remote designed for a different frequency or series will always result in a failed sync.
- Damaged or worn LEARN button. The LEARN button is a physical component that can wear out over time. If pressing the button produces no indicator light, the button itself or the circuit board may be damaged.
- Radio frequency interference. San Francisco’s dense urban environment is full of wireless signals. Busy streets, nearby tech offices and high concentrations of smart home devices in residential buildings can all create interference that disrupts garage door remote signals. This is especially relevant in areas like the Financial District, SOMA and densely packed residential blocks in the Mission.
- Opener is too old to accept new remotes. LiftMaster openers from the mid-1990s or earlier use a DIP switch system rather than a LEARN button. These systems require a different programming method entirely and may not be compatible with modern remotes.
- Internal wiring or circuit board issues. If the motor unit itself has electrical problems, it may not be able to store or recognize new remote codes at all.
What to check for each issue:
- Verify remote compatibility using the model numbers of both the remote and the opener
- Inspect the LEARN button for visible damage or sticking
- Move the opener closer to the motor unit during programming to rule out interference
- Check the age of the opener and research whether it still supports modern remote programming
Preventive Tips to Avoid Syncing Problems in the Future

The best garage door problem is the one that never happens. A little bit of regular attention goes a long way in keeping a LiftMaster remote working reliably for years.
- Replace batteries proactively. Do not wait for the remote to completely stop working. Replacing the battery once a year, even if it still seems functional, eliminates one of the most common causes of syncing and operation failures.
- Store remotes away from heat. Leaving a remote in a car that sits in direct sunlight can warp the casing and damage the battery over time. While San Francisco is not known for scorching heat, summer afternoons in neighborhoods like the Mission or Potrero Hill can get warm enough to affect electronics left in a parked car.
- Inspect remote contacts regularly. The Bay Area’s marine layer and salty coastal air, particularly in neighborhoods close to the Embarcadero, Crissy Field and Ocean Beach, can slowly corrode the metal contact points inside the remote casing. Periodically opening the battery compartment and checking for corrosion or buildup can catch this early.
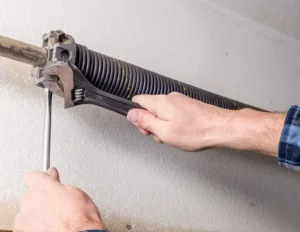
- Schedule annual garage door tune-ups. A professional inspection once a year covers not just the remote and opener, but also the springs, cables, rollers and sensors that keep the entire system running safely. Critical maintenance tasks like commercial door cable replacement are often identified during a routine tune-up before they turn into a much bigger and costlier problem down the road.
- Keep the motor unit clean. Dust and debris that accumulate on or near the motor unit can affect the antenna’s ability to receive remote signals. A quick wipe-down during seasonal cleaning is all it takes.
When to Stop DIYing and Call a Garage Door Professional
There is a point where troubleshooting crosses over into territory that genuinely requires a trained technician. Knowing where that line is can save both time and money and in some cases, it can prevent a safety issue from getting worse.
Signs it is time to call a professional:
- The opener makes unusual noises. Grinding, clicking, or straining sounds when the door operates suggest a mechanical problem inside the opener that has nothing to do with the remote sync.
- The remote syncs but the door still does not move. This points to a problem with the opener’s drive system, the door’s springs or cables, or a safety sensor issue, none of which are DIY fixes.
- Multiple remotes stopped working at the same time. When several remotes fail simultaneously, the problem is almost certainly with the opener itself, not the remotes. This can indicate a failed logic board or a power issue.
- The opener is 10 or more years old. Older units that are consistently having issues may simply be at the end of their service life. In San Francisco, where home values are high and daily reliability matters, upgrading to a newer commercial insulated garage door system with a LiftMaster model with MyQ capability is often the smarter long-term investment.
- There is visible damage to the motor unit or wiring. Any sign of burnt wiring, a cracked casing, or physical damage to the opener should be handled by a licensed technician immediately.
Garage door opener repair and reprogramming services in San Francisco typically run higher than the national average due to Bay Area labor costs. Minor repairs and professional reprogramming tend to fall in a lower to mid-range cost, while logic board replacements or full opener installations sit at a higher average cost. Always request a written estimate before authorizing any work.
One Last Thing Before You Head to the Garage
Syncing a LiftMaster remote control is one of those tasks that sounds technical but is very manageable once the basics are understood. Starting with the right model information, locating the LEARN button, confirming the battery is fresh and following the proper pairing steps covers the vast majority of syncing situations that homeowners in San Francisco will ever encounter.
That said, some problems run deeper than a remote sync. When the door is making strange noises, when multiple remotes fail at once, or when an older unit just cannot keep up anymore, reaching out to a qualified garage door professional is the smartest move. In a city like San Francisco, where home investment is significant and daily convenience matters, keeping the entire garage door system in top shape, from the opener and remotes down to the commercial door weatherstripping, is well worth the attention.
Still Having Trouble? Leave It to the Local Pros
When professional help is needed, Automatic Garage Door Corporation has been a trusted name among San Francisco homeowners for years. From LiftMaster remote programming and opener repairs to full system replacements, our team brings hands-on expertise and honest service to every job. Whether the garage door is acting up in the Sunset District, the Mission, or anywhere across the Bay Area, we are the local team that homeowners count on to get it done right the first time. Ready to stop guessing and get your garage door working perfectly? Contact us today or give us a call and let the experts handle the rest.